

Traveling with your bike can seem overwhelming. It certainly doesn’t fit underneath the seat in front of you or in the overhead bin. But when you compare traveling with your bike to the inconvenience of having to drop it with a shipping service, days or even weeks in advance of your travel, leaving it out of your hands and out of your control for an extended period, packing it up and flying it with you on the plane is a much more attractive option once you know how.
Packing your bike for travel is just like riding a bike: get the hang of it once and it soon becomes second nature. You might even wonder why you were so intimidated by it to begin with!
How to pack a bike box: Starting out
For starters, you’ll want to check with your airline to see what their policies are on bicycles. The good news is that an increasing number of airlines no longer charge a surcharge for a bike; they simply treat it as they would any piece of checked luggage, subject to the same size and weight restrictions. I highly recommend planning ahead and even selecting your carrier based on bicycle surcharges (or lack thereof). Compared to a shipping service, flying with your bike can be cheaper.
RELATED: Which Airline Has the Best Bike Fees?
Next, you’ll need to choose a bike box, bag, or case. There are a lot of options, starting with something as simple as a cardboard box. Beyond that, there are soft bags, hard cases, and hybrid cases. You’ll want to research how your bike will fit into each option. Some key questions to ask are:
- Do you have an integrated front end that is complicated or virtually impossible to dismantle?
- Are you an especially tall rider and will your larger frame meet the box dimensions?
- How many wheels does the case allow you to take and is carrying multiple wheel options important to you?
- Is the bag/box/case easy to store when not in use?
- Does it have wheels so you can roll it rather than carry it?
- Does it have handles making it easy to grab and lift into and out of a vehicle?
- How much does it weigh before you put a bicycle in it?
- What does it cost?
Your answers to some of these questions, coupled with how often you will travel with your bike, will help drive some of your decisions.
Choosing the best bike box for triathletes
Below is a chart with some pros (+) and cons (-) of each type of case and an example of each type:
| Cardboard Bike Box | Soft Case (e.g., Scicon Aerocomfort Road 3.0) | Hard Case (e.g., Thule Round Trip Sport Case) | Hybrid (e.g., Evoc Road Bike Bag Pro) | |
| Cost | + | – | + | – |
| Disassembly required | – | + | – | + |
| Ease of transport | – | + | + | + |
| Multiple Wheel Option** | – | – | – | – |
| Weight before bike | + | + | – | + |
| Storage | – | + | – | + |
**Two better known options for carrying multiple wheels are Biknd Helium (which can accommodate two wheelsets) and Bike Box Alan (which can carry three wheels).
I travel with a Bike Box Alan Triathlon Aero Easyfit Bikebox. I chose it for its durability, the protection it gives the bike in transit, and the ease of packing. There is minimal disassembly required. It also allows for a third wheel, which, in certain scenarios is a good option to have.
Step one: Travel with a clean bike
(Photo: Dede Griesbauer)
I like to start my process with a clean bike—a clean bike is a fast bike! Pre-race, I’ll often drop my bike off with my local bike mechanic for a tune-up. You’ve invested a lot in your race, so it’s best to make sure your bike is functioning as it should prior to travel. They will often clean the bike at the same time they tune it, so that’s a bonus. If I’m simply traveling with it, say for a training camp, I’ll still give it a good wipe down before I pack it up.
Step two: Mark all measurements
Before you disassemble your bike, make sure your bike is “marked.” Anything you take off the bike for packing (lowering the saddle or removing the seat post, for example), you’ll want to make sure you are able to rebuild the bike to the precise specifications you disassembled it from.
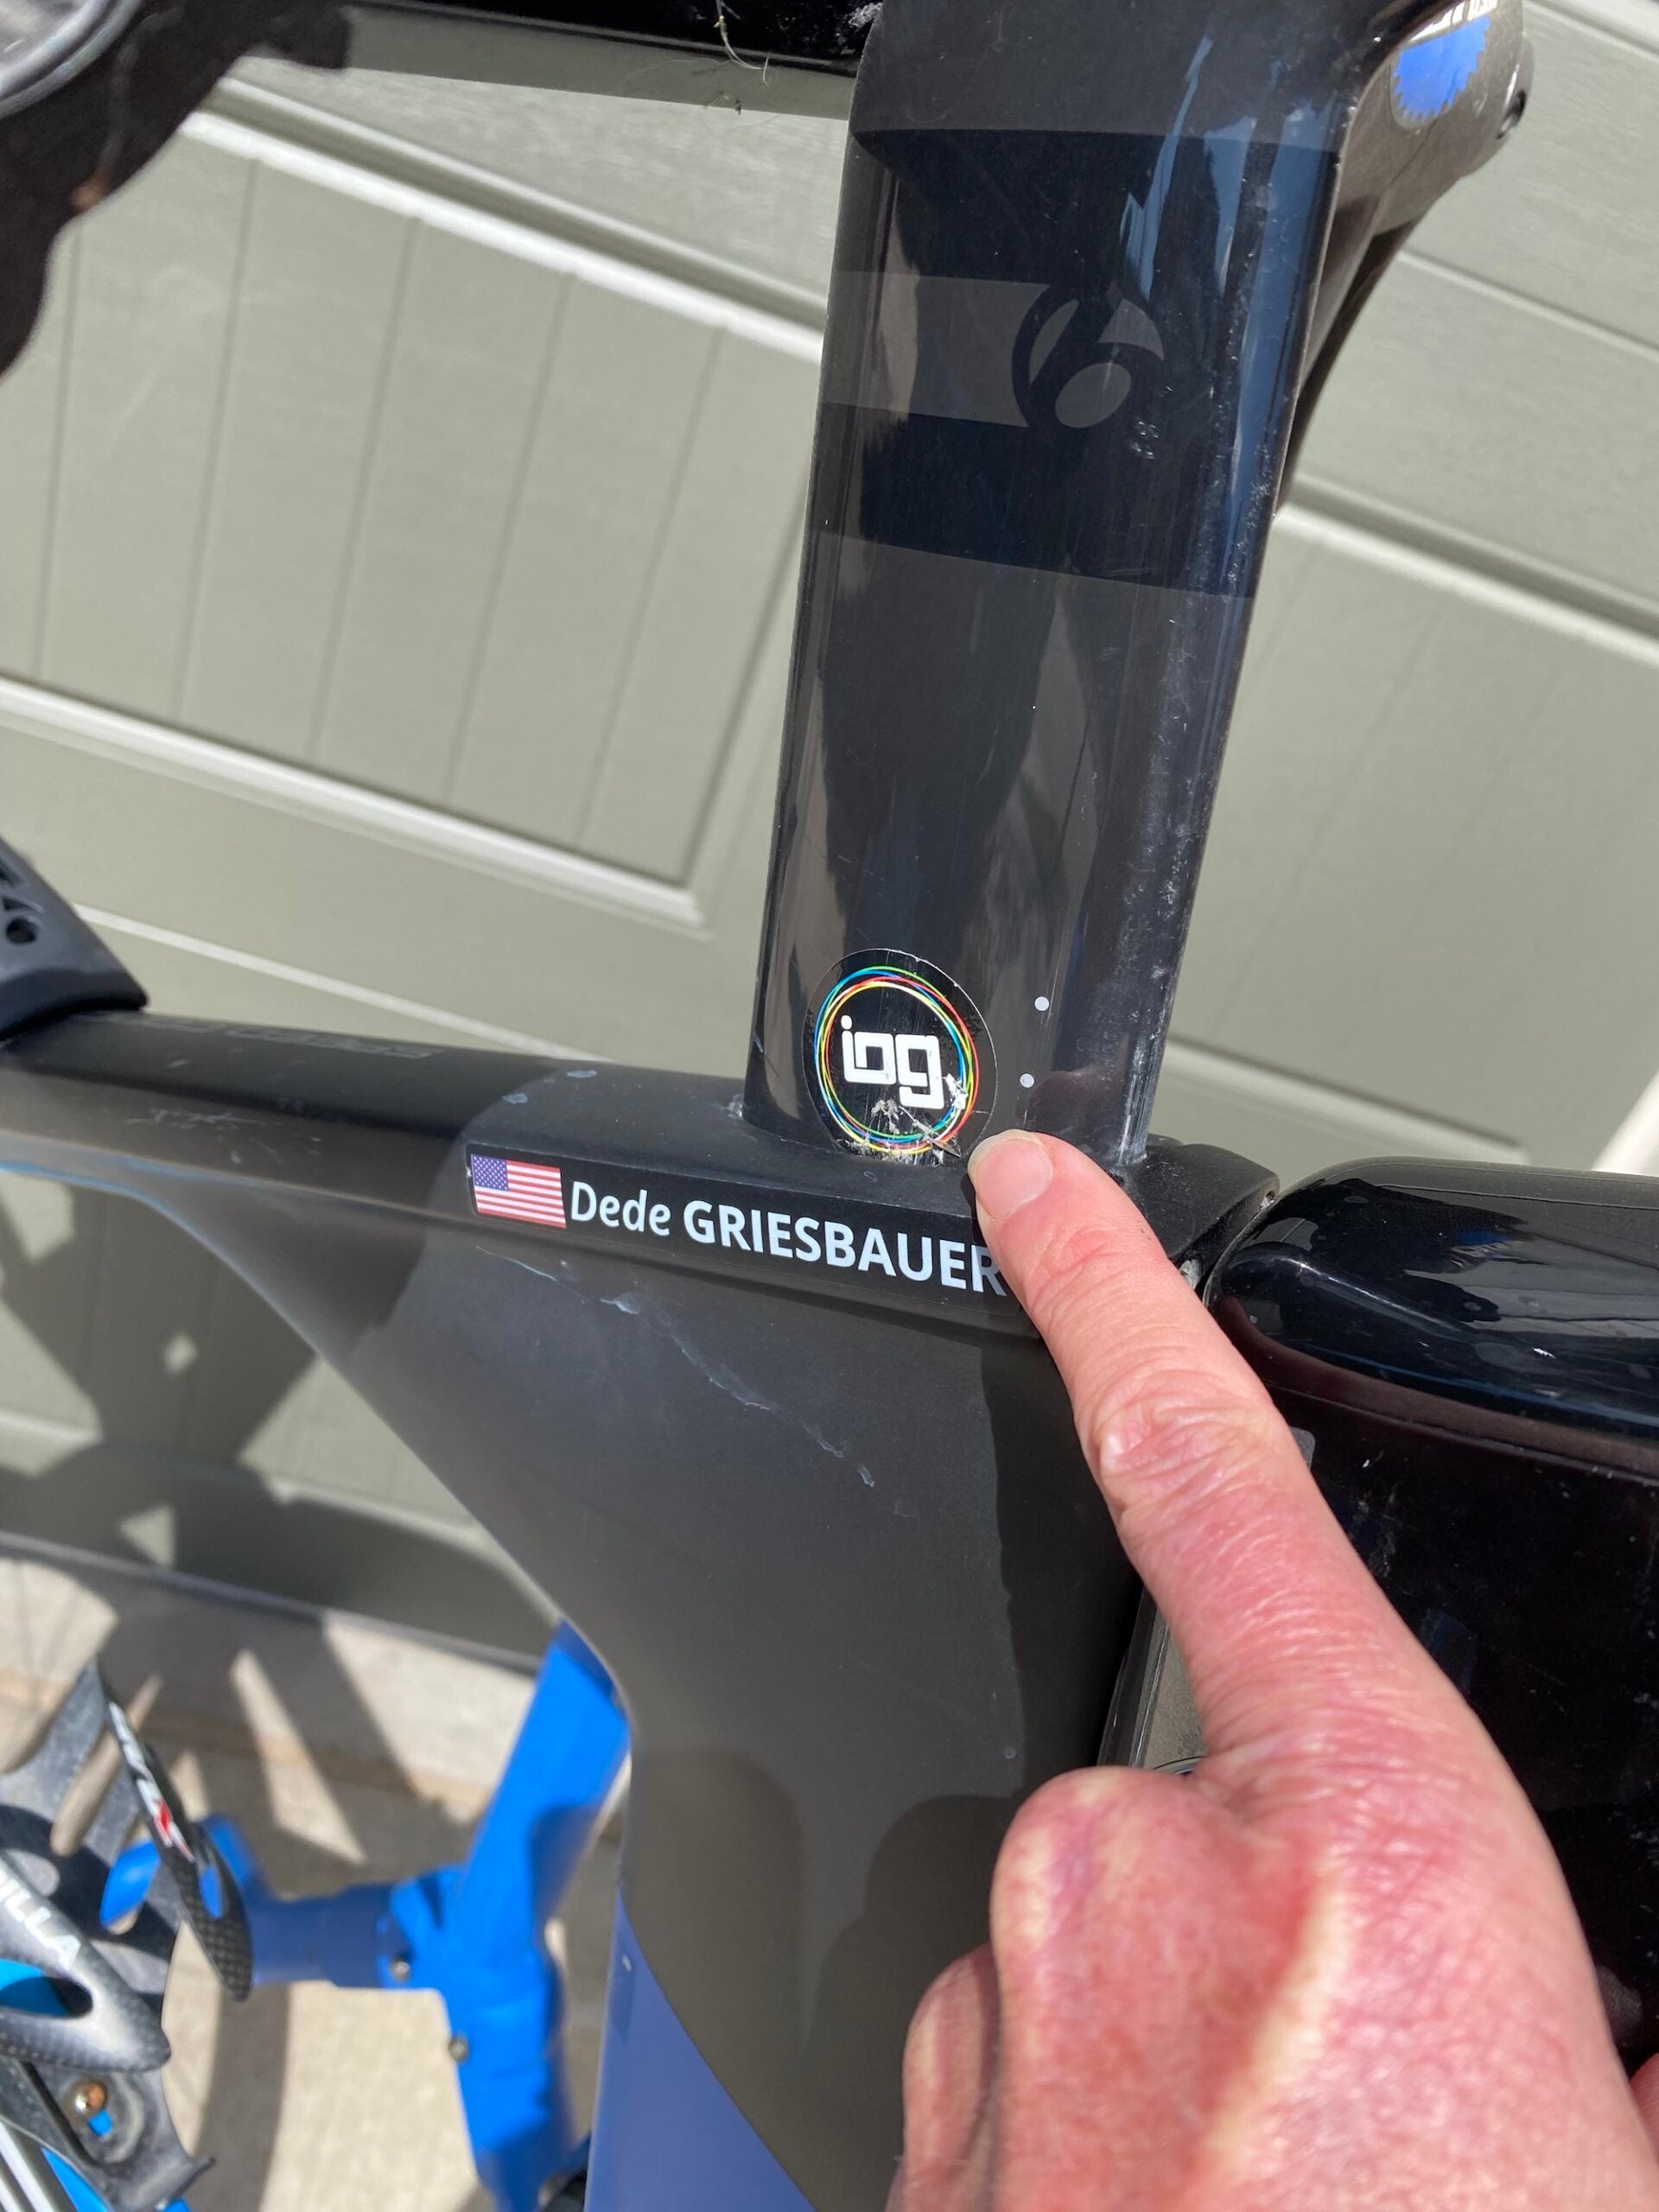 (Photo: Dede Griesbauer)
Step three: Remove CO2 cartridges
Also remember to remove all CO2 cartridges from your saddle bag or tool kit. The airlines prohibit CO2 cartridges on planes, and since the bike will be inspected by the TSA, they will remove any CO2 cartridges they find and leave you a nasty-gram, scolding you for it. Leaving them in can cause delays in your bike making it to the plane on time, so plan ahead and remove that CO2! You can purchase a race day CO2 cartridge at a local bike shop or at the race expo at your destination.
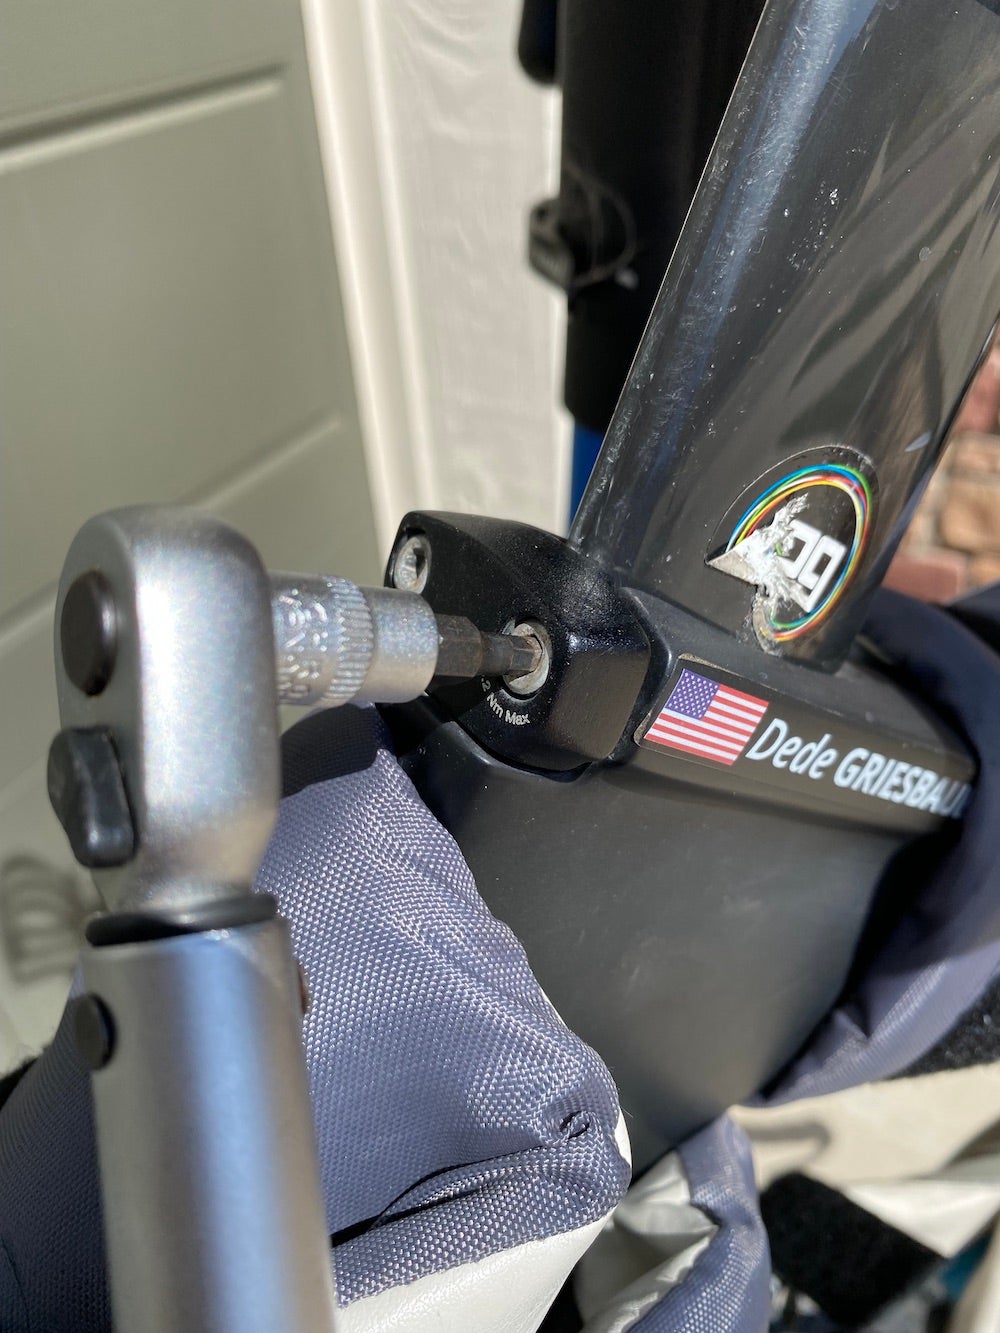
Step four: Have the right tools
Another piece of equipment that is good to have as you pack (and then rebuild your bike) is a torque wrench. A torque wrench enables you to tighten bolts to a precise amount. The different bolts on your bike, be it on the stem or seat post, require a specific amount of tension and a torque wrench allows you to dial that in precisely. Most bikes are labeled at each bolt with specific tension instructions, so while standard allen keys will work, a torque wrench will ensure you get the bolts tightened exactly as they were meant to be.
 (Photo: Dede Griesbauer)
Step five: Pedals off
I start by removing my pedals. It’s always easiest to remove the pedals when the bike is upright and the wheels are on so that you have the leverage you need to loosen them. You need a simple pedal wrench, or an allen key. Pro tip? Always loosen the pedals by twisting the pedal wrench in the direction of the rear stays.
I wrap my pedals in some padding for protection (bubble wrap will do or use an old t-shirt) and then zip them up in my shoe case. If you don’t have a shoe case, a small drawstring bag is a great option. Logically, I like to keep the pedals together with the shoes for travel. This detail is certainly not mission critical, but “a place for everything and everything in its place” is a great approach to take on any bike packing mission.
 (Photo: Dede Griesbauer)
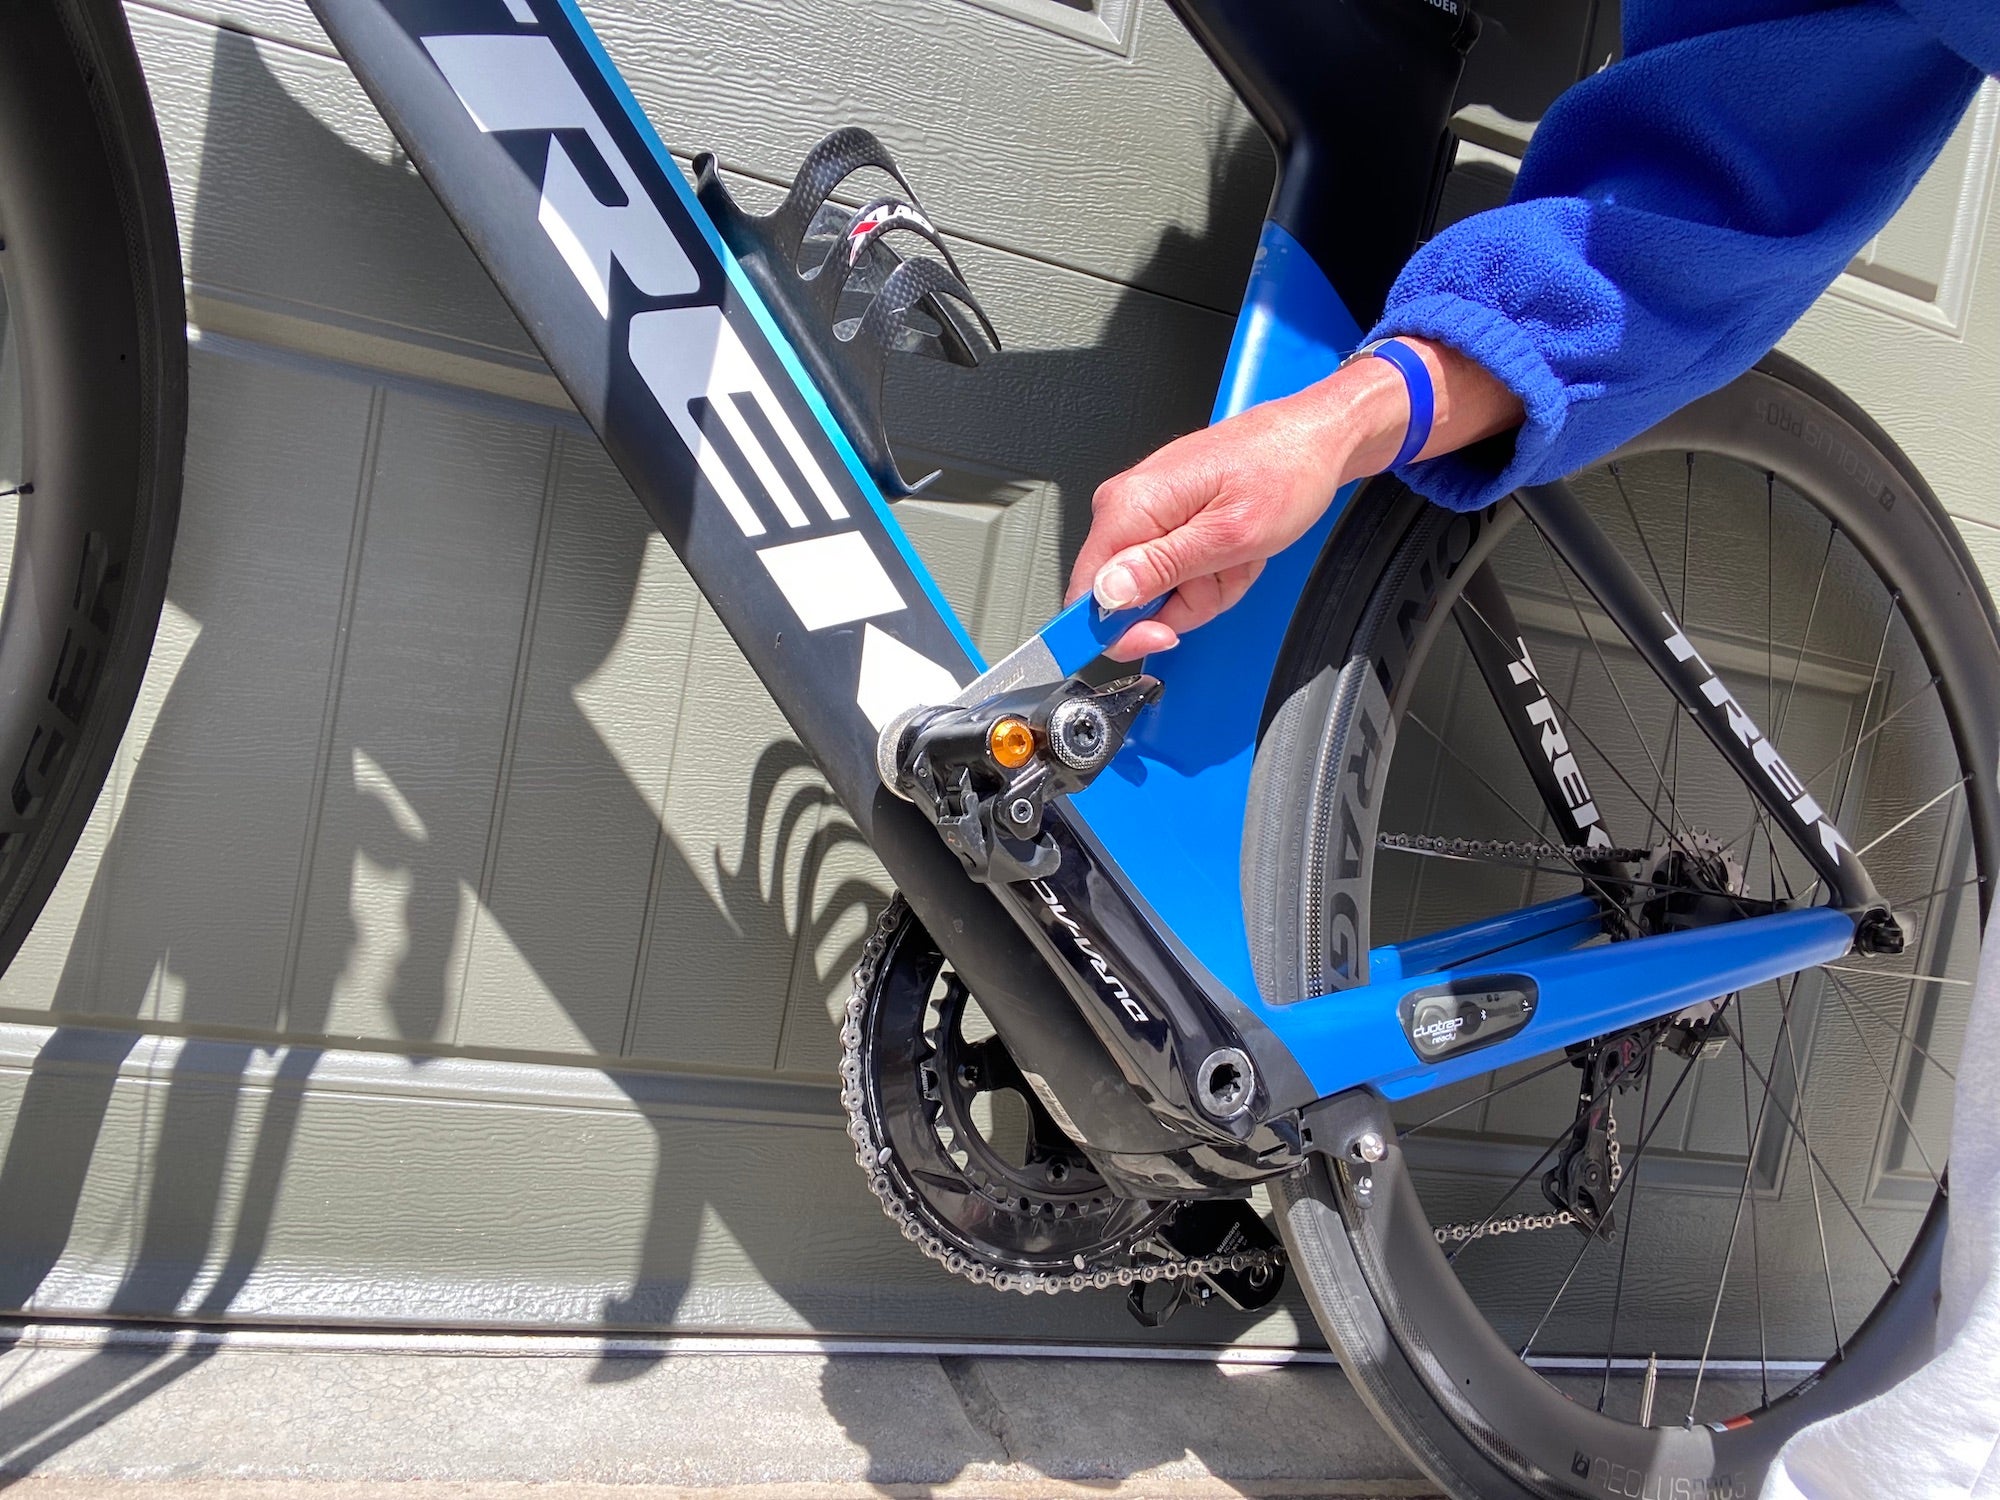
Step six: Wheels off
Next, I remove the wheels. Take the skewers out and place them in a gear bag. If you have disc brakes, put the thru axles into your dropouts and remember to put spacers into your disc brake calipers. Pro tip? If you don’t have a proper spacer, a small wedge of cardboard will do. Be sure to deflate your tires. You don’t need to deflate them fully, but removing pressure from the tires will prevent them from exploding due to pressure changes once you’re airborne.
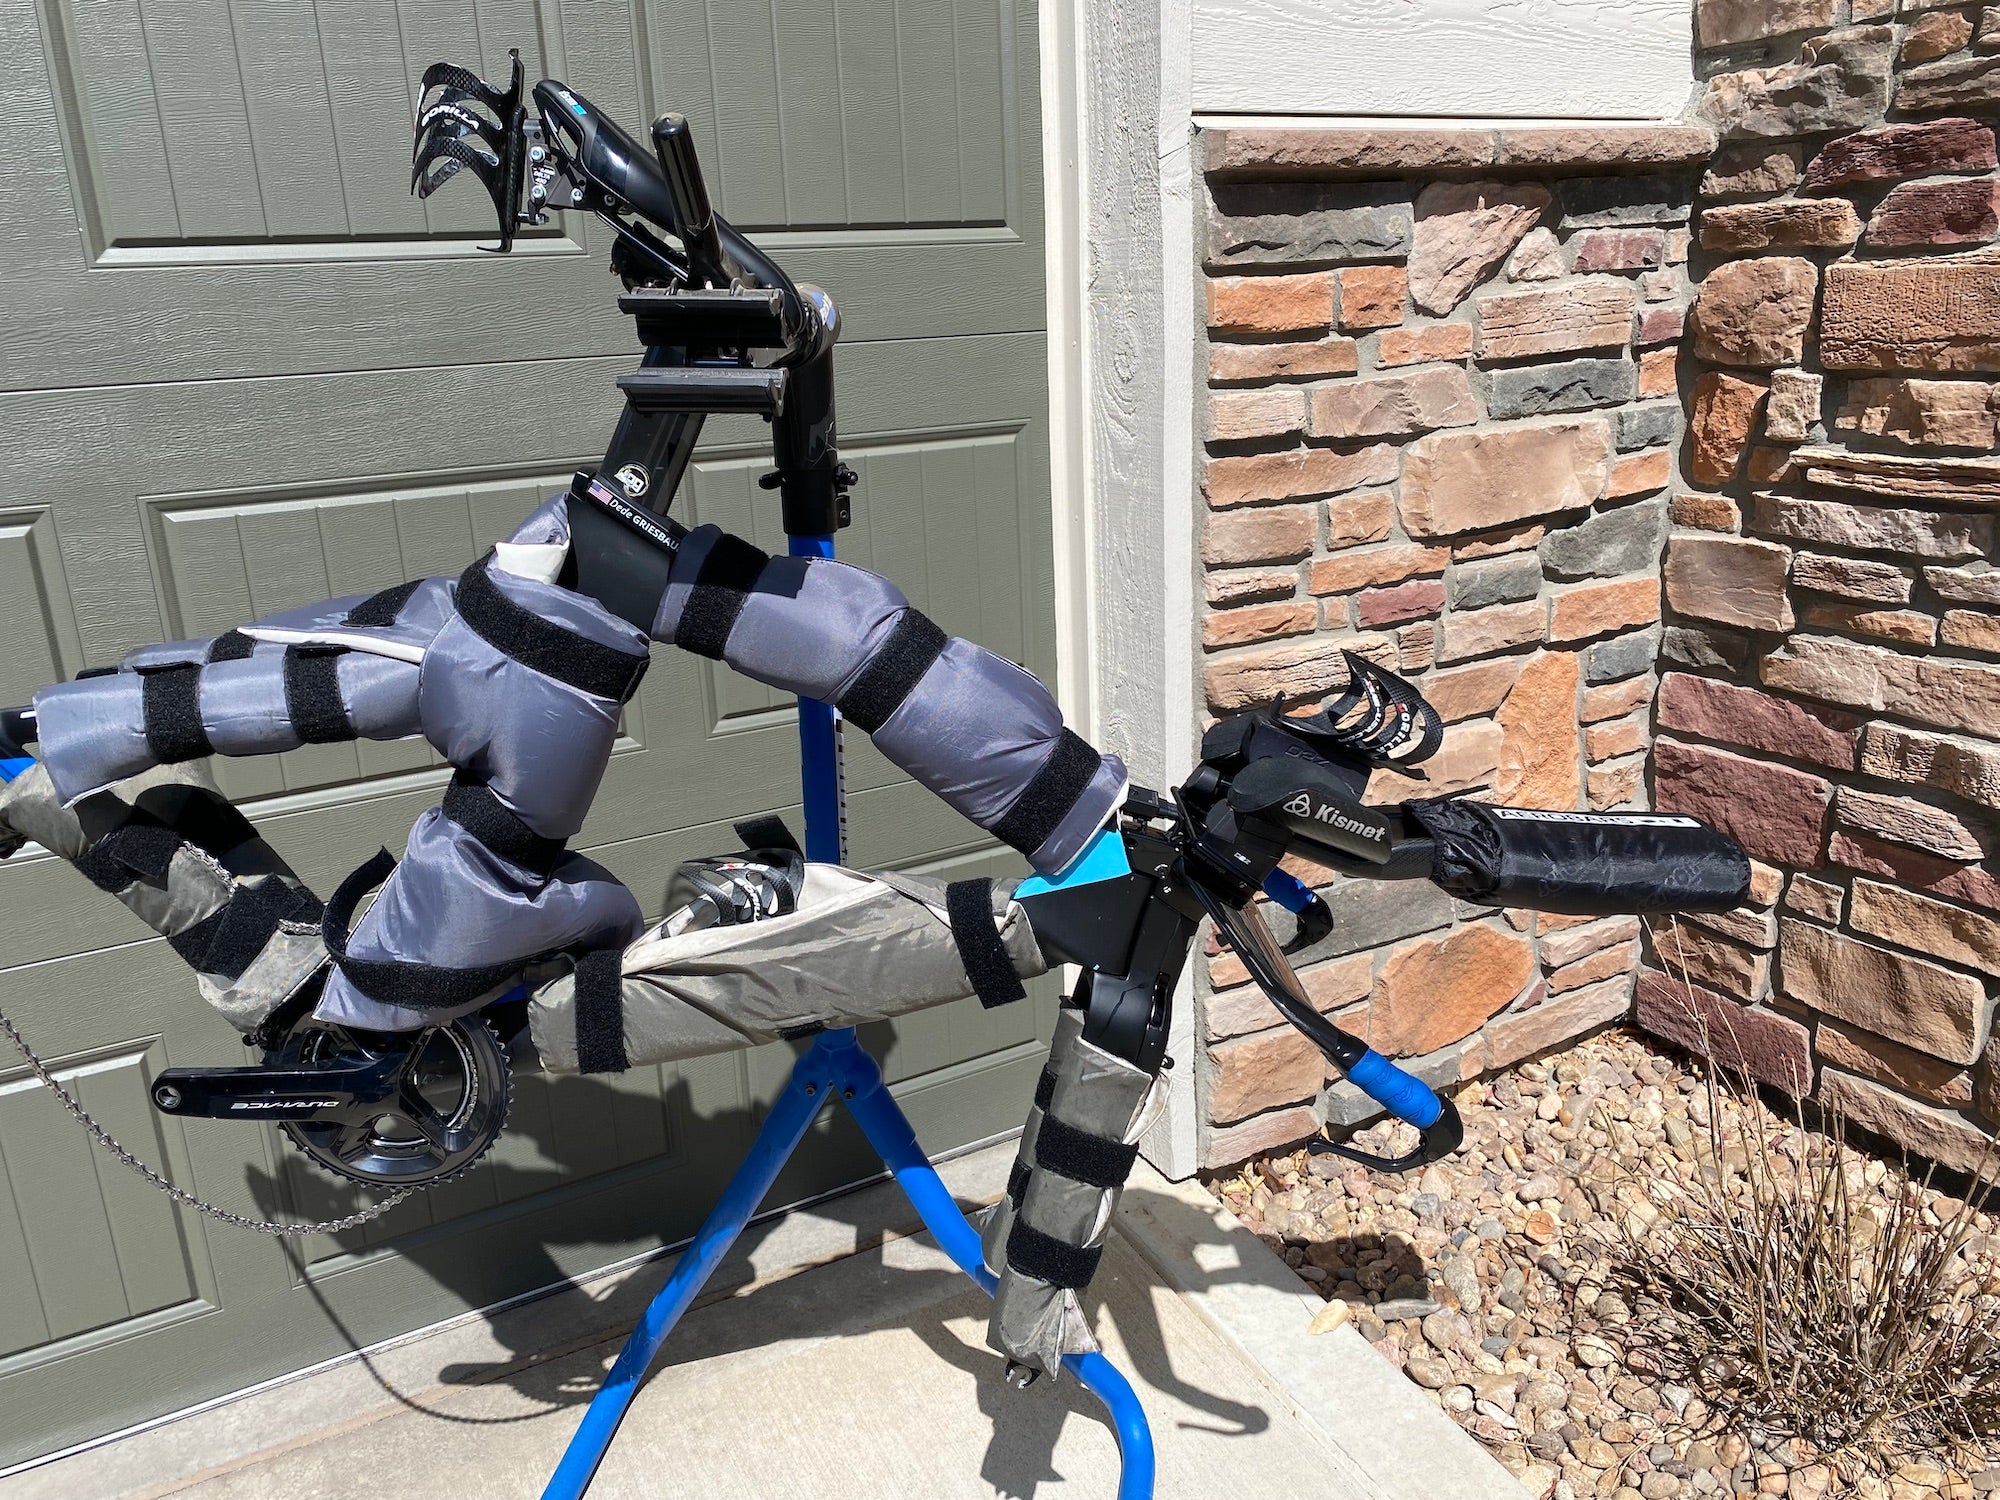
Before I put my bike in the case, I take the extra step to pad it up. My case is highly durable, so I’m being extra cautious. If you are using a soft case, I highly recommend taking the extra step to pad the bike as some of the soft cases don’t provide the same protection to the frame as a hard case. Years ago, I was given a set of pads for my bike. They come in two sizes; the bigger ones fitting the top tube and down tube and the smaller ones fitting the fork and stays. Unfortunately, they don’t make these anymore, but if you head to your local hardware store or Home Depot, you can grab some pipe insulation foam noodles. They’re great for protecting your frame and they are easy to cut to size. Bubble wrap or pool noodles are other great options.
 (Photo: Dede Griesbauer)
In order to fit my bike into my case, I need to lower my seat post, again, making sure my seat height is properly marked so I can return it to the proper height when I unpack the bike. That is the only adjustment I need to make prior to packing, which is why I chose this particular bike box. Many other bike boxes will likely require you to remove the seat, pull off or rotate the handlebars at the stem, and/or detach the back derailleur.
Removing your rear derailleur is easily done, again, with an allen key. You may also need to adjust your front end, either shortening your extensions, or even removing your aero bars entirely or taking off your handlebars at the stem. Again, make sure all angles and heights are marked and measured so you can build it back to its original fit. Wrap up both your derailleur and handlebars as well, and ensure they’re tightly secured and not loose in the bike box.
Pro tip with the bolts on your bike: righty-tighty, lefty-loosey. Tighten bolts to the right. Loosen them by turning left. If you are using a torque wrench, there will be a switch on it depending if you are tightening or loosening your bolts.
You might also consider unplugging your electronic shifting. If the buttons get depressed during transit, it can drain your battery. Alternatively, or in addition to, I think it’s a great idea to travel with your charger anyway. It’s a small addition to your gear bag that can resolve a lot of headaches on the other end of travel.
Once your bike is prepped for packing, then follow the instructions for your specific box, bag, or case. If you are a first-timer? Ask an experienced friend or your local bike shop to help walk you through it for the first time. Give yourself a test run a few weeks before your event so you can make sure you have all the right tools and steps.
 (Photo: Dede Griesbauer)
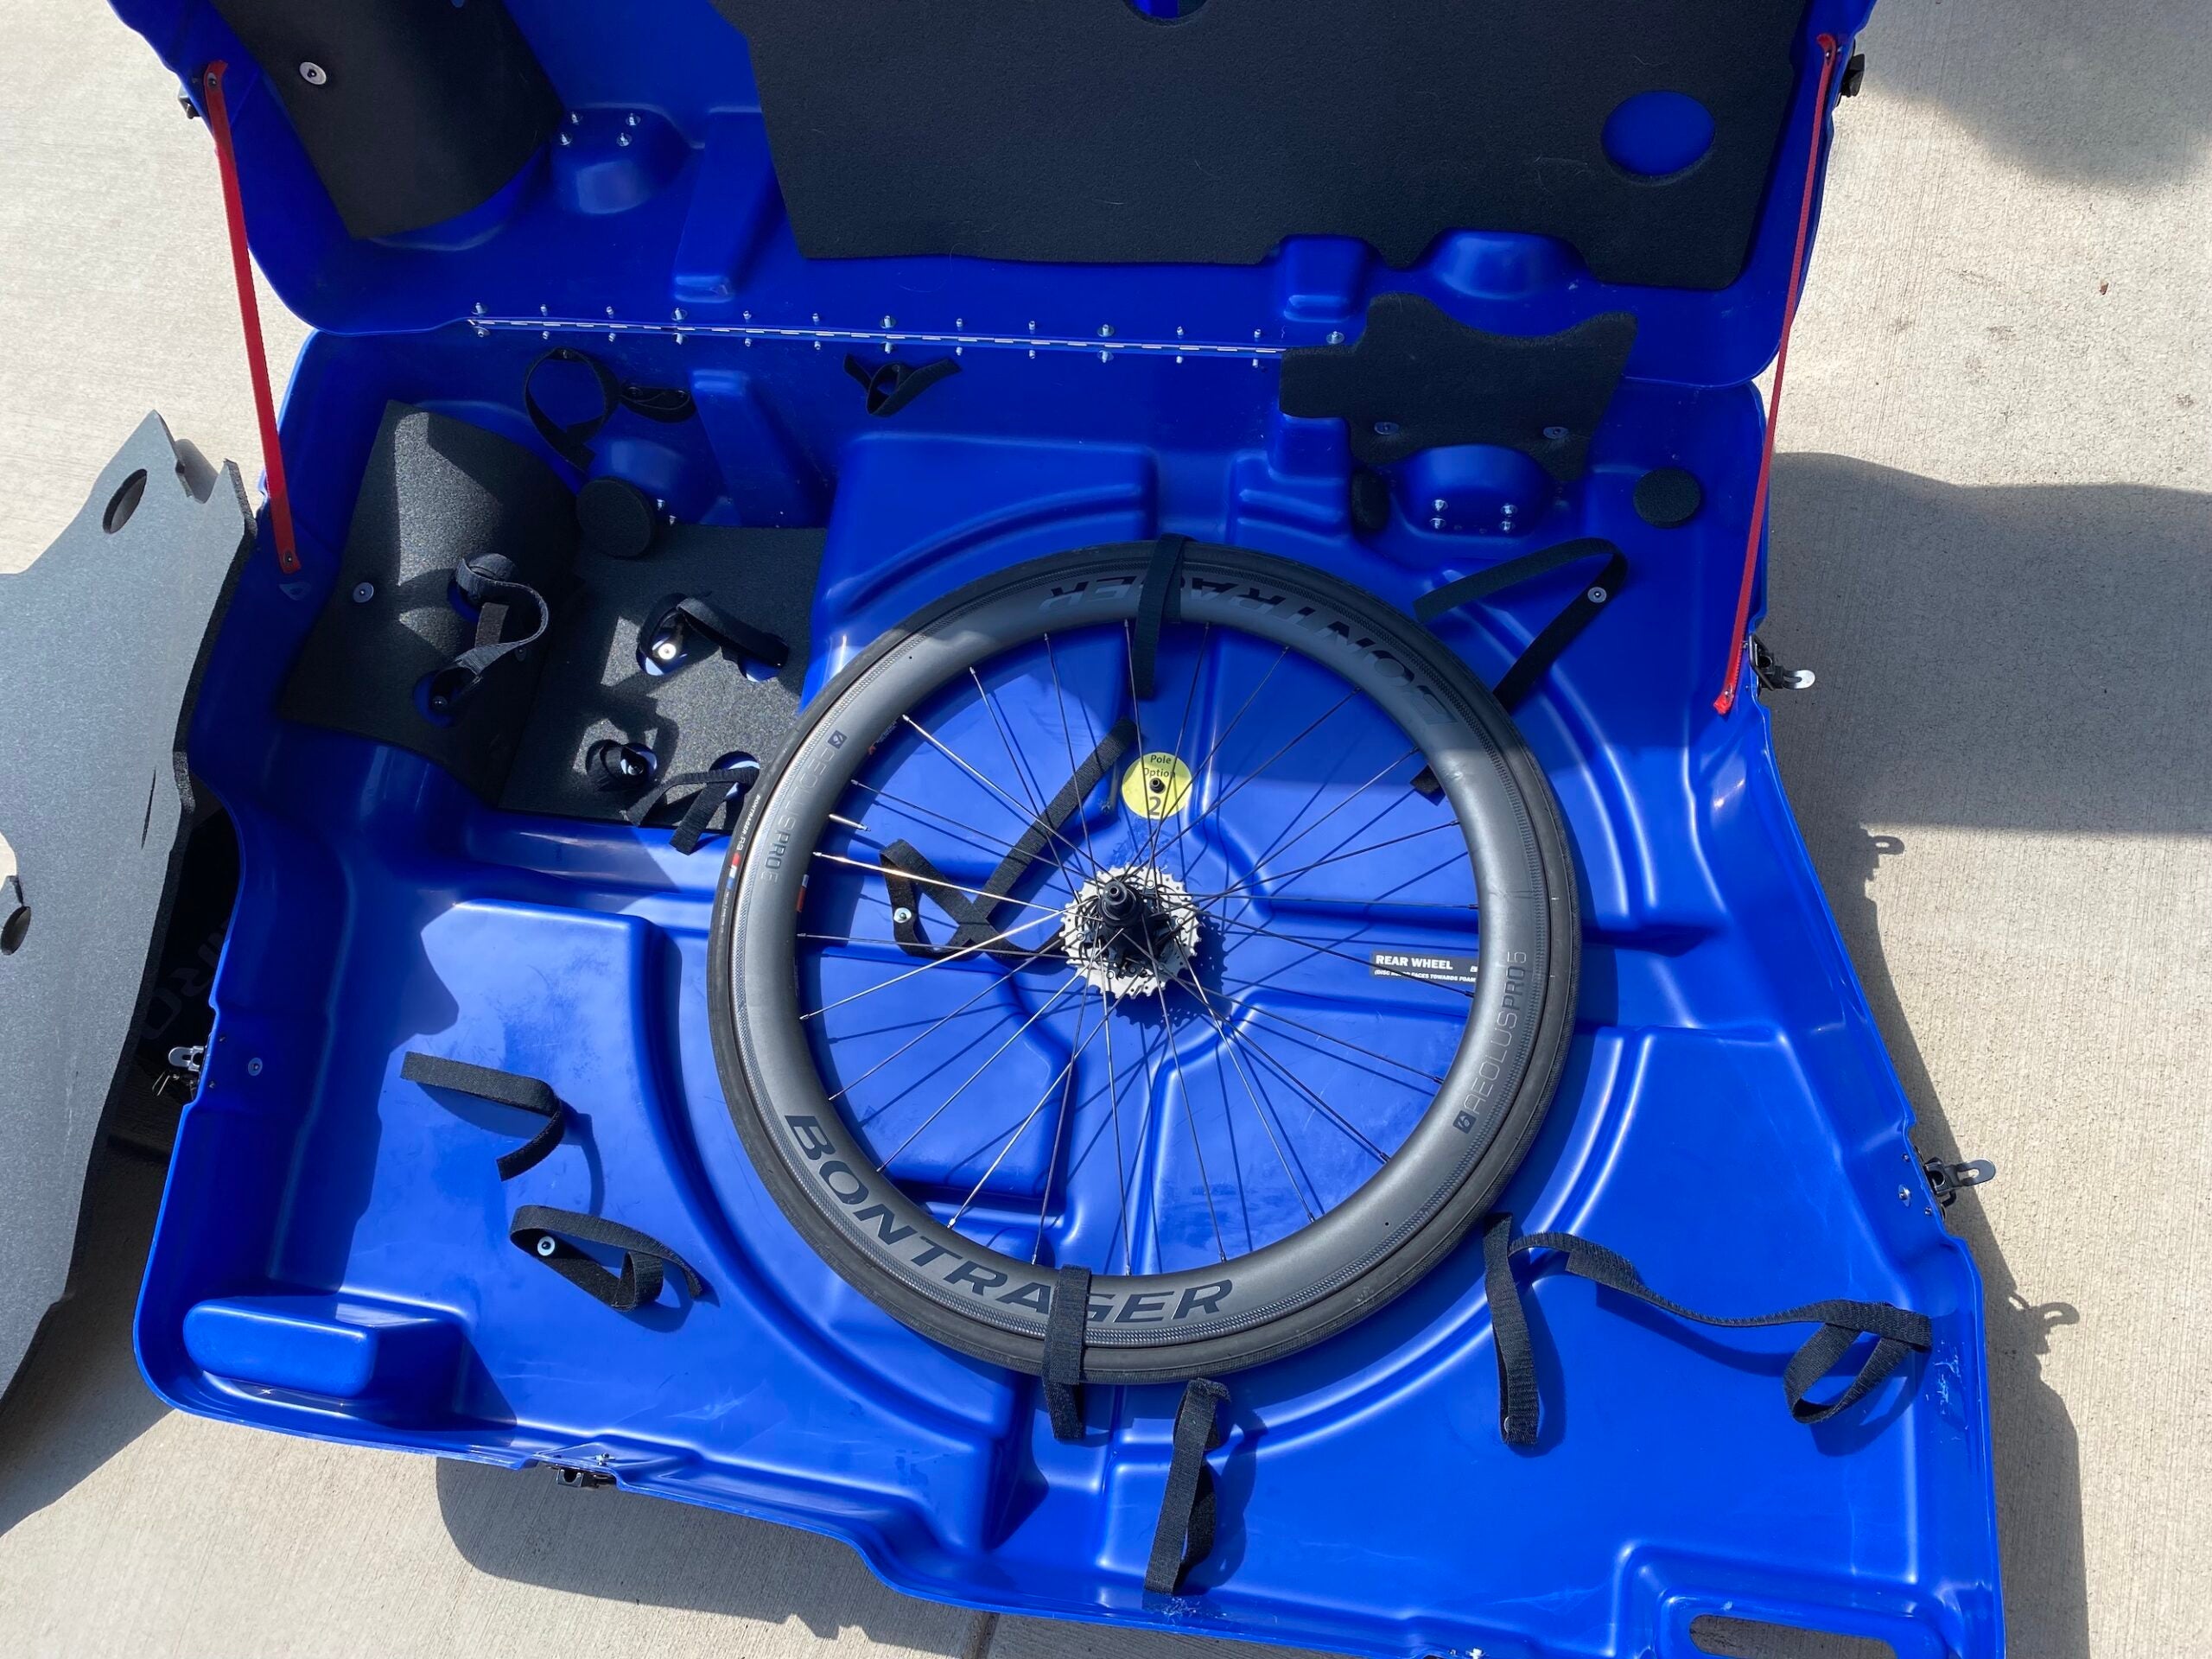
In my case with a Bike Box Alan, I lay a wheel in the bottom of the case (as pictured above), then a layer of protective foam. I place my padded frame on top, securing it to the case with the Velcro straps. I tuck my shoe/pedal bag in under the aero bars.
Pack other gear carefully
Some people will pack a lot in their bike bag or box, e.g., a helmet, wetsuit, clothes, etc. If you do that, just be mindful of the weight it adds. Most airlines will have a 50lb weight limit (70lbs for International travel or for some classes of premium passengers), so if you over-stuff, you may pay the price (quite literally). Also, because TSA individually inspects the bike, the more you put into the box, the more they have to pull out to inspect. It’s a terrible headache when you try to jam 67 items into your bike box and have the TSA only remember to put 66 of them back in!
I put the front wheel into the top of the case, affixing it with the Velcro to hold it in place. I place the second layer of foam protection between the wheel and the frame, and then close the box, making sure that the crush poles line up.
Handle with care
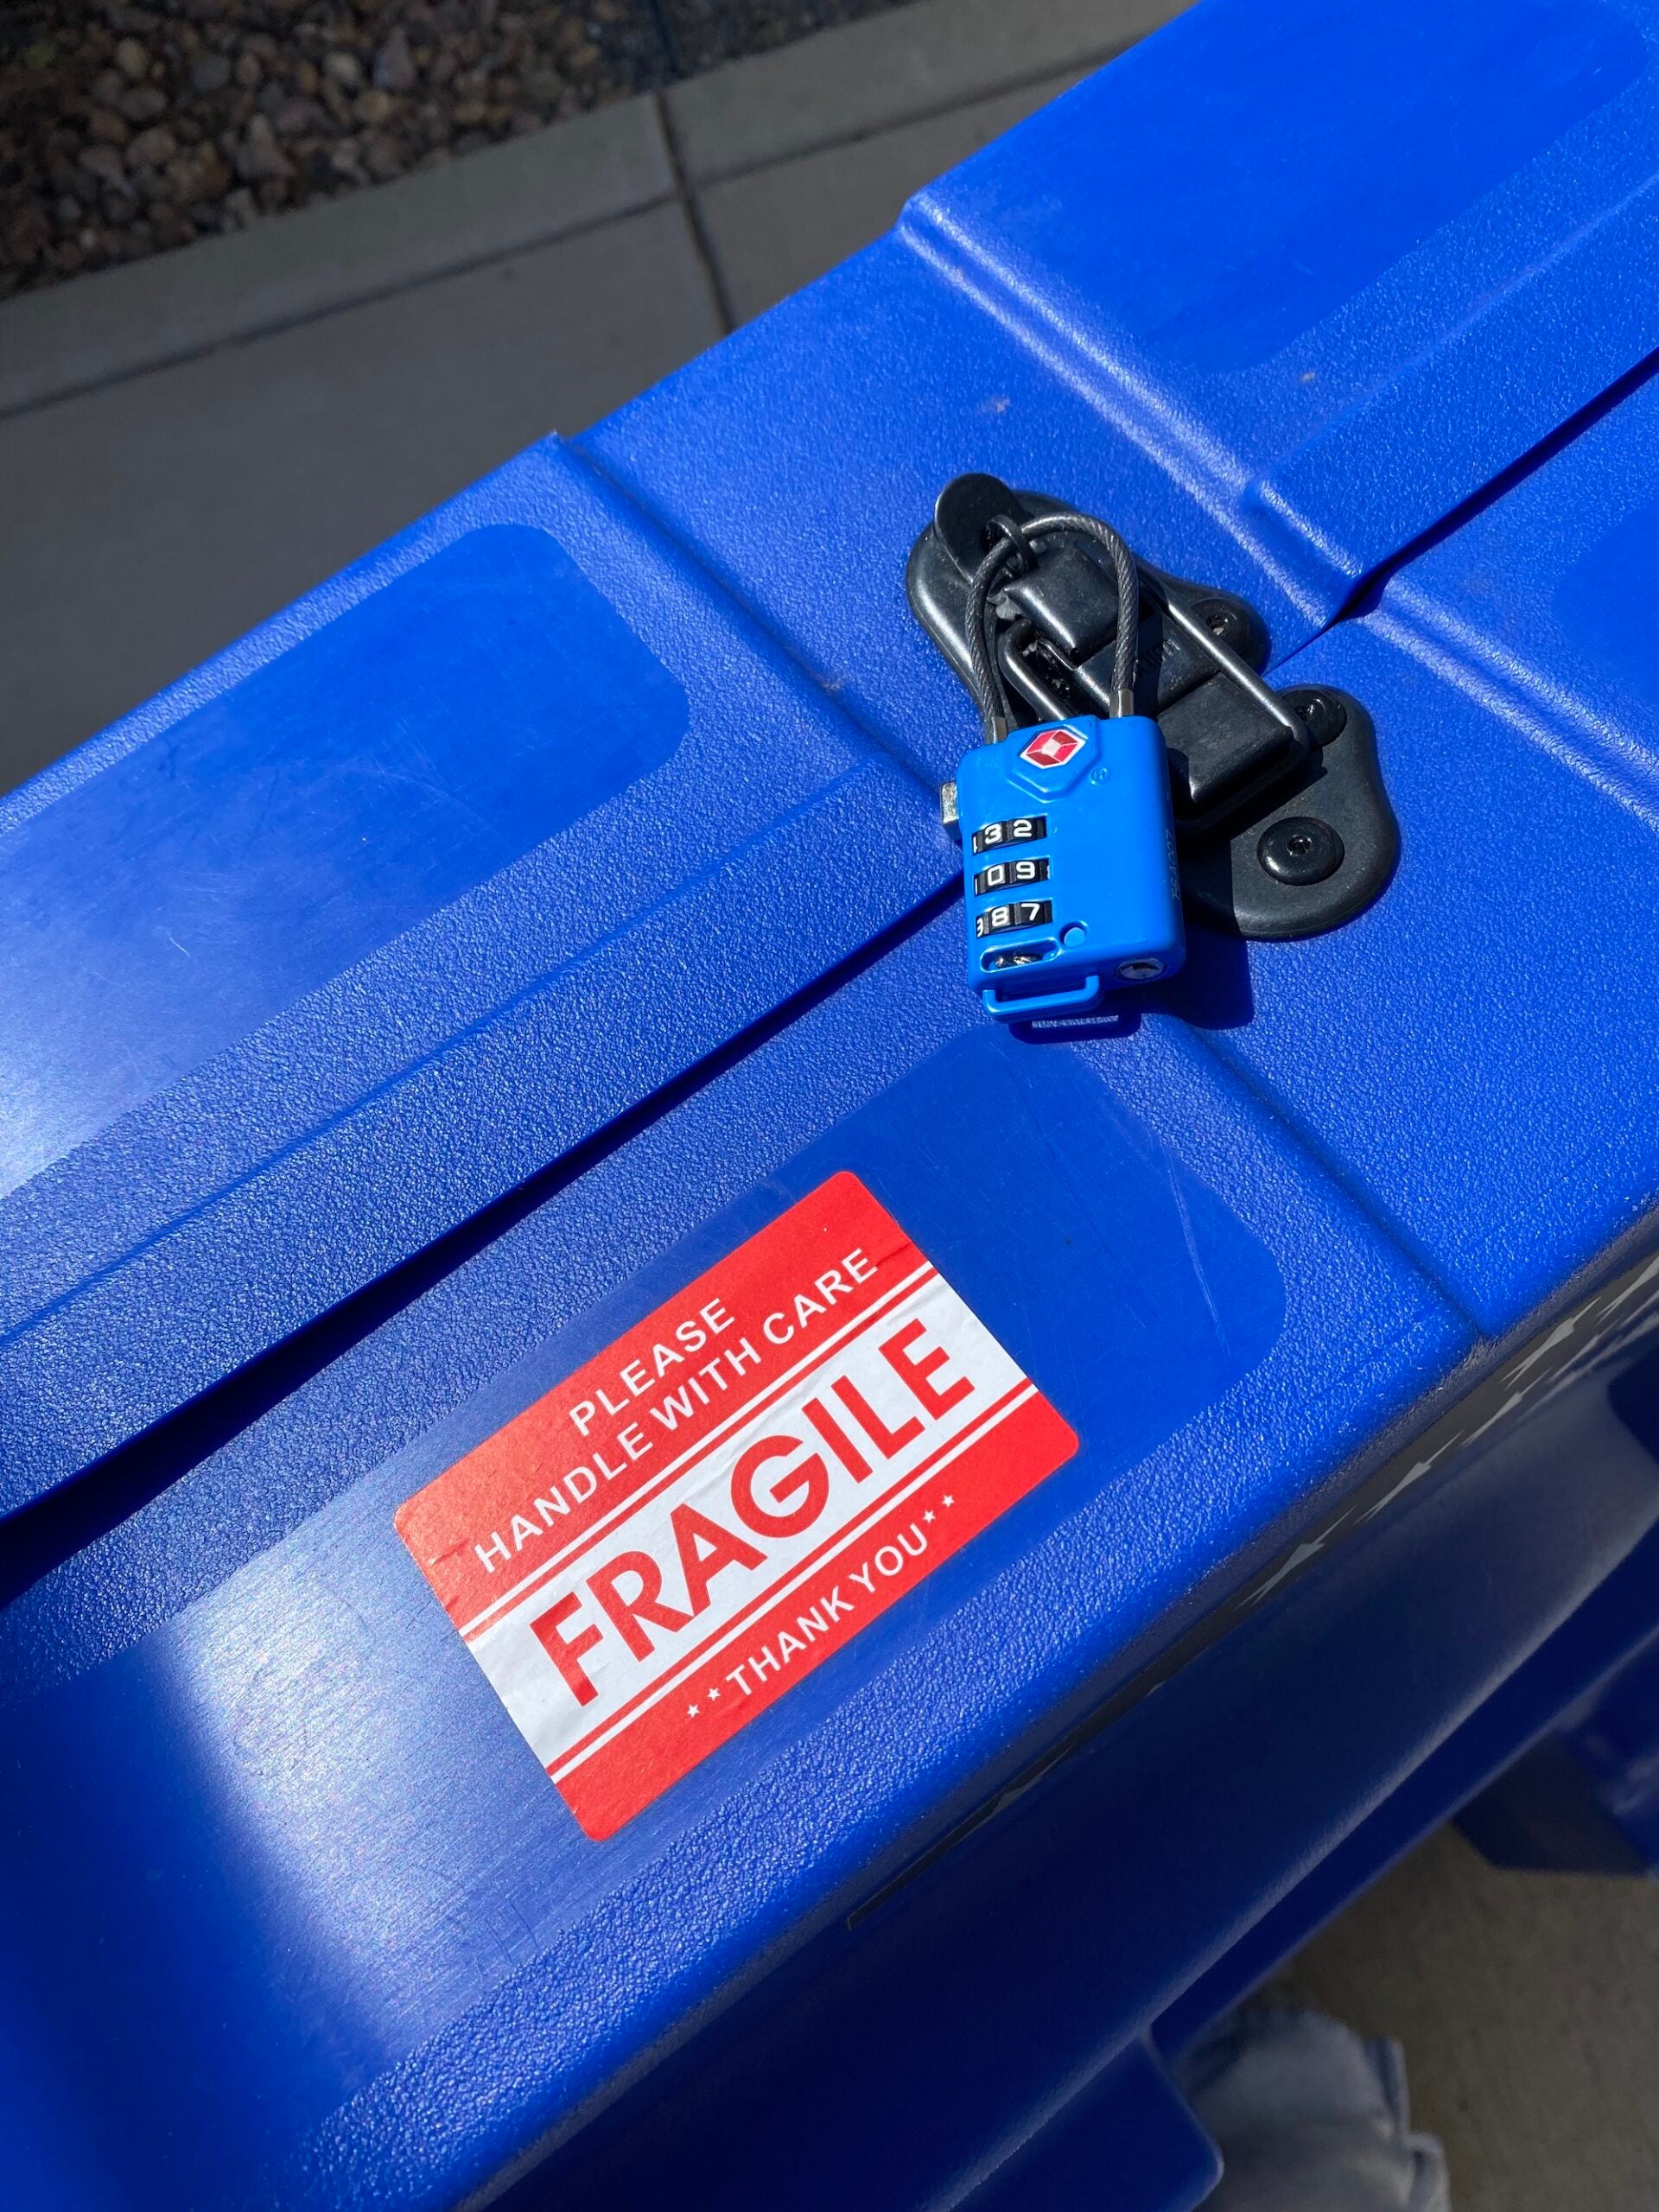
I add a couple of “Fragile” stickers to the exterior of the case. I don’t know that they do any good in encouraging the TSA to be slightly more careful with it, but nevertheless, I find it brings some peace of mind. It’s a good idea to place identification both inside and outside the box. Bag tags easily get knocked off, so it’s always prudent to put your name and contact information on the inside of the case as well. I affix a TSA lock to the case (some cases will include a TSA lock on the case itself)—and off we go to the airport!
 (Photo: Dede Griesbauer)
More top pro travel tips
When I’m traveling with my bike, I like to allow plenty of time at the airport because the bike gets individual TSA screening. If you want to make sure your bike makes your flight, I suggest doing the same. I don’t use a tracking device like an AirTag in my bike box, though it’s not a bad idea. My preferred airline (United) has a tracker on their app, which I refresh obsessively until I see the luggage has been loaded onto the flight.
Other tips for flying with your bike? Direct flights are better than connections, obviously minimizing the number of times the bike changes hands. And if you are forced to make connections? I pack my patience and choose more liberal connecting times. It’s one thing for me to sprint through an airport to make my connection, but it’s absurd to assume baggage services will do the same! So instead of the 20-minute connecting flight, I’d always opt to wait the extra hour in the airport. It gives you a greater probability that your bike makes the connection and arrives when you do.
If you are hiring a car during your trip, make sure the car you are renting can fit your bike box, bag, or case. Pro tip? In the “large vehicle” category, pickup trucks typically rent for less than SUVs and minivans. You can save a few bucks that way with most rental car companies.
When you arrive at your destination, your bike will arrive, most often, to the oversized luggage area, so if you are waiting forever at the standard carousel and don’t see it, don’t panic. Ask where oversized luggage is delivered, and you will likely find it there. Bikes almost always come off last, so again, be patient.
I always take a moment to open my bike box for a quick inspection before leaving the airport. If there is any damage to the bike or the box/case, it needs to be reported immediately and it’s easier to manage it while you are still at the airport.
In the event something does happen to your bike or your case, again, some advanced planning goes a long way. Consider purchasing luggage insurance or check with your homeowners/renters policy. Certain credit cards, as well, will cover your luggage, so it’s worth checking your specific policies for details.
It might all seem like a lot, but flying with your bike isn’t difficult. Having the right tools, knowing the basics about your bike, knowing airline policies, and booking your travel thoughtfully can make it a breeze and you have the additional peace of mind that your bike is never too far away. Plus, it’s a super fun game at the airport when fellow passengers ask, “What’s in there?” Make them guess. You’ll be highly amused by what they come up with.
RELATED: 5 Steps to Ensuring Your Bike is Race-Ready After Travel


